Safe Removal of DIY Debris After Chiswick Renovations
Renovating a home in Chiswick is often satisfying in the best possible way. A fresh kitchen, a stripped-back hallway, a better layout, maybe a loft finally made usable. Then the dust settles and you are left with the awkward part: bags of broken plaster, offcuts of wood, cracked tiles, old fittings, and the kind of mixed debris that somehow spreads everywhere. Safe Removal of DIY Debris After Chiswick Renovations is the bit that protects your property, your back, and your peace of mind.
This guide explains how to sort, move, and dispose of renovation waste safely, what usually goes wrong, and when it makes more sense to bring in a professional clearance team. It is practical, local-minded, and written for real people who would quite like the job done without a trail of sharp nails across the driveway. Fair enough, really.
Table of Contents
- Why it matters
- How the process works
- Key benefits and practical advantages
- Who needs this and when it makes sense
- Step-by-step guidance
- Expert tips for better results
- Common mistakes to avoid
- Tools, resources and recommendations
- Law, compliance, standards, or best practice
- Options and comparison
- Case study or real-world example
- Practical checklist
- Conclusion
- Frequently asked questions
Why Safe Removal of DIY Debris After Chiswick Renovations Matters
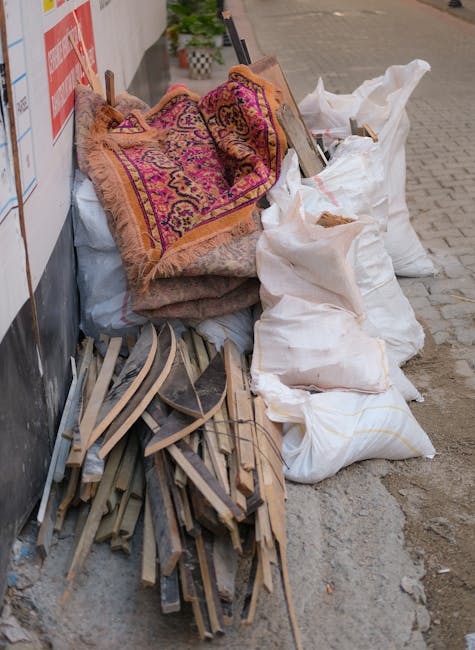
DIY renovation waste looks harmless at first. A few plaster chunks, a pile of skirting board offcuts, a broken sink, a dusty old carpet roll. But once it starts stacking up, the risks become obvious. Sharp edges catch skin and clothing, heavy bags strain your shoulders, and mixed debris can become a slip hazard almost overnight. If you have a narrow Chiswick terrace, a shared driveway, or a basement flat with awkward steps, the issue is even more obvious. One bad lift and the whole day changes.
Safe disposal matters for another reason too: renovation waste is rarely just one material. It is often a mix of timber, metal, plasterboard, packaging, tile shards, insulation remnants, and general rubbish. That mix needs sorting if you want to handle it responsibly. Some items can be reused or recycled, but only if they are separated properly and kept clean enough to process. Lump it all together and you make the task harder, messier, and more expensive in the long run.
There is also the local reality of living and working in west London. Space is tight. Parking can be awkward. Neighbours do not always love a corridor stacked with rubble sacks. And nobody wants dust and debris tracked through freshly cleaned rooms. The safe approach saves time, keeps the project looking controlled, and helps you avoid that last-minute panic when the renovation is technically finished but the place still feels like a building site.
Expert summary: if your DIY job has created anything sharp, heavy, dusty, or mixed, treat the removal stage as part of the renovation itself, not a separate chore you can improvise later.
How Safe Removal of DIY Debris After Chiswick Renovations Works
The clean-up process works best when it is broken into sensible stages. Most people try to carry everything out at once, which is usually where the trouble starts. A steadier method is simpler and, to be fair, much less annoying.
1. Identify the waste type
Start by separating what you have. Typical DIY debris after renovations includes plaster, bricks, tiles, timber, doors, old fixtures, packaging, and dust-heavy materials. Some items are reusable. Others need proper waste handling. If you are dealing with paint tins, adhesives, or broken electrical items, treat them cautiously and do not assume they belong in a general sack.
2. Remove hazards first
Before you touch the larger pile, deal with exposed nails, broken glass, loose screws, splinters, and anything likely to cut or puncture. A quick sweep with gloves and a brush saves a lot of grief later. You will notice immediately how much calmer the space feels once the obvious hazards are gone.
3. Bag and bundle correctly
Use strong rubble sacks for heavier waste and avoid overfilling them. A bag that is too heavy becomes unsafe fast. Bundle timber separately if possible. Keep dusty materials sealed so you are not dragging a grey cloud through the house. That cloud gets everywhere, honestly.
4. Move waste along a clear route
Lay down protection on floors if you need to move debris through finished rooms. Use a direct route to the exit and keep doors open only where practical. A clear path reduces mess and lowers the chance of tripping. If stairs are involved, pause and split the load. No heroic lifting, please.
5. Decide what can be recycled, reused, or removed as mixed waste
Some renovation waste can be recycled, especially clean timber, metal, cardboard, and certain mineral materials. Mixed waste is harder to process, so the more you separate in advance, the better. If sorting is not realistic, a professional waste removal service can help clear it in a way that is more efficient than trying to improvise on a Saturday afternoon.
6. Final sweep and safety check
Once the bulky items are out, sweep or vacuum thoroughly. Check corners, skirting edges, under radiators, and around door frames. Small shards love hiding there. One little screw underfoot at 7 a.m. has a way of ruining the mood for the rest of the day.
Key Benefits and Practical Advantages
Safe debris removal is not only about avoiding injury, although that is obviously a big part of it. It also improves the flow of the entire project. When the waste is under control, you can actually see progress, which matters more than people think. Renovation fatigue is real. A cluttered room feels unfinished even if the main job is done.
- Less risk of cuts and strains: sharp edges, broken ceramics, and heavy sacks are much easier to manage when handled correctly.
- Cleaner living space: dust and debris do not spread as far when removal is organised.
- Better reuse and recycling potential: sorted materials are easier to recover responsibly.
- Faster project completion: a tidy site makes follow-on decorating or furnishing much smoother.
- Fewer neighbour headaches: less mess on shared paths, front gardens, or communal access routes.
- Lower stress: there is something deeply calming about seeing the last pile disappear. Small victory, but still a victory.
If the renovation involved bulky items as well as debris, it can also help to look at related services such as furniture disposal or furniture clearance when old pieces need to go out before the new room can breathe.
Who This Is For and When It Makes Sense
This kind of debris removal is for anyone who has taken on a DIY project and now needs the aftermath dealt with properly. That includes homeowners, landlords refreshing a flat between tenants, families updating kitchens or bathrooms, and people renovating before a sale or move. It also covers the weekend improver who started with one wall and somehow ended up with three rooms under plastic sheeting. Happens more often than you would think.
It makes particular sense when the waste is too awkward for regular household bins, too heavy for repeated car trips, or too mixed to sort easily at home. If you live in a flat, a house with limited outdoor storage, or a property with restricted access, the challenge rises quickly. In those cases, using a structured clearance method is often the safer and more practical choice.
It is also worth considering if your renovation created waste in more than one part of the property. For example, a loft project might leave insulation, timber, packaging, and old stored items all in one go. A broader service like loft clearance can be a better fit where debris is mixed with old contents. Likewise, if the whole property is being reset after works, home clearance or even house clearance may be more appropriate than trying to handle everything as separate piles.
Truth be told, the best time to decide is before the waste starts blocking the hall.
Step-by-Step Guidance
Here is a practical, no-nonsense approach you can follow. It is not glamorous, but it works.
- Pause and assess the site. Walk the space slowly and look for hazards, blocked walkways, fragile flooring, and objects that could puncture bags.
- Separate materials by type. Keep timber, plasterboard, metal, rubble, cardboard, and general rubbish apart where possible.
- Pack the sharp stuff first. Broken tile edges, glass, metal trims, and protruding fixings should be contained before anything else.
- Use the right containers. Strong sacks, buckets, or stackable tubs are better than flimsy carrier bags that split at the first awkward corner.
- Lift correctly. Bend at the knees, keep the load close, and avoid twisting while carrying. If it feels too heavy, it probably is.
- Protect surfaces. Use floor coverings or old boards if you are dragging anything through finished rooms.
- Load from heaviest to lightest. This keeps bags stable and makes the pile safer in a vehicle or skip area.
- Do a final magnet-and-sweep check. A small magnet can help with screws and nails. Then sweep, vacuum, and inspect the corners again.
- Arrange disposal in one go if possible. Multiple small trips often mean more mess, more time, and more chances to spill something on the stairs.
If the debris pile has grown beyond what you want to handle yourself, a specialist builders waste clearance option is often the cleanest way to remove mixed renovation waste without dragging it through the rest of the house.
Expert Tips for Better Results
There are a few habits that make a surprisingly big difference. Most of them are simple, which is why they get skipped. Classic.
Keep one bag for "unknowns". During a renovation, odd fixings and tiny offcuts appear everywhere. A dedicated bag for miscellaneous scraps stops them from floating around the site.
Do the heavy work early in the day. Energy is better, the hallway is quieter, and you are less likely to start rushing because you are tired. Mid-afternoon lifting always feels worse than it looked in the morning.
Watch moisture. Wet plasterboard, damp cardboard, or rain-soaked packaging becomes heavier and harder to handle. If debris gets wet, deal with it promptly.
Protect shared areas. In Chiswick, many properties have tight entrance spaces, shared paths, or communal halls. A dust sheet or temporary floor protection can save an awkward conversation later.
Think about the next stage. If decorators, carpenters, or fitters are coming in after you, leave the property as clear as possible. They will work better, and you will probably save time too.
Keep a realistic limit. A home renovation is not a badge-of-honour contest. If the waste is too much for one van load, too many stairs, or too awkward to sort, bring in help. That is not failure. It is just sensible.
Common Mistakes to Avoid
Most problems with DIY debris removal come from trying to save a bit of time and losing a lot of it later.
- Overfilling sacks: a bag that bursts on the way out is a miserable thing to clean up.
- Mixing everything together: once rubble, timber, plaster, and soft waste are combined, sorting becomes harder and less efficient.
- Ignoring sharp edges: exposed nails and broken ceramic edges cause avoidable injuries.
- Dragging waste across finished floors: one careless move can scratch wood, tile, or laminate.
- Trying to carry too much at once: it slows you down and raises the chance of a fall.
- Leaving dust until the end: fine dust spreads easily and can settle into vents, corners, and freshly painted surfaces.
- Forgetting access constraints: stair width, parking, and neighbour access all matter more than people expect.
One very common mistake is underestimating the total volume. What looks like "just a few bags" can become a pile that swallows the boot of the car and half the hallway. It has a funny way of multiplying overnight.
Tools, Resources and Recommendations
You do not need a huge toolkit for safe removal, but the right basics make the job cleaner and easier.
- Heavy-duty rubble sacks: for masonry, plaster, broken tiles, and dense debris.
- Work gloves: ideally something sturdy enough to resist splinters and rough edges.
- Safety glasses: especially useful when breaking down material or sweeping dusty corners.
- Dust masks: helpful if you are dealing with fine dust, insulation residue, or long sweeping sessions.
- Brush, shovel, and vacuum: the basic trio. Not fancy, but reliable.
- Wheelbarrow or sack truck: useful if you need to move waste a longer distance or down a drive.
- Floor protection: cardboard, dust sheets, or reusable floor coverings for clean routes.
- Seal-able tubs or boxes: good for screws, brackets, fittings, and other small metal pieces.
For larger mixed loads, it can be worth looking at a broader waste removal approach rather than trying to build a makeshift system from spare bags and hope. That usually ends badly, or at least messily.
If you are comparing service quality and reassurance, the provider's health and safety policy, insurance and safety information, and recycling and sustainability approach are sensible things to review. They tell you a lot about how carefully the work is handled.
Law, Compliance, Standards, or Best Practice
For DIY debris removal in the UK, the key point is simple: you should dispose of waste responsibly and use a method that does not put people or the environment at unnecessary risk. There are different practical obligations depending on whether you are working on your own home, managing a rental, or operating as a business, so it is wise to stay within accepted local and national waste-handling practice.
In plain English, that means no fly-tipping, no careless dumping, no mixing potentially problematic items into general rubbish if they need special handling, and no unsafe lifting or transport. If waste is being collected by a clearance provider, it should be handled in a way that is consistent with normal UK waste expectations, including proper transfer and disposal routes. If you are unsure about a specific material, the safe answer is usually to separate it and ask for guidance rather than guessing.
For landlords, contractors, or business owners, record-keeping and duty of care become more relevant. Even for a domestic project, though, it is still best practice to know what you are handing over, what can be recycled, and what should be treated as general mixed waste. That little bit of care makes the whole process cleaner and more defensible.
If you want to understand how a provider approaches those responsibilities, a look at their public pages such as terms and conditions, privacy policy, and complaints procedure can help set expectations. Not thrilling reading, perhaps, but useful.
Options, Methods, or Comparison Table
There is more than one way to handle renovation debris. The best choice depends on volume, access, time, and how mixed the waste is.
| Method | Best for | Advantages | Limitations |
|---|---|---|---|
| Self-loading into bags and bins | Small, light DIY jobs | Low cost, flexible, straightforward | Time-consuming, physically demanding, limited capacity |
| Van-based clearance | Mixed waste and bulky debris | Fast removal, less lifting over time, better for awkward access | Requires proper planning and a suitable provider |
| Dedicated builders waste clearance | Rubble, plaster, timber, and renovation leftovers | Efficient for post-work clean-up, suitable for heavier loads | May be more than you need for a very small project |
| Full property clearance | Major refurbishments with old contents and debris | Best for whole-house resets, lofts, or properties being cleared before handover | Not necessary for a simple room refresh |
For some projects, a targeted service is enough. For others, the debris is only one part of a larger clear-out. If you are also dealing with old storage, mixed items, or damaged household contents, a flat clearance or garage clearance style approach may fit the reality of the job better.
Case Study or Real-World Example
A fairly typical Chiswick scenario goes like this. A homeowner strips out a small bathroom over a long weekend. By Sunday evening, the room looks better, but there are bags of broken tiles, a boxed-up sink, old fittings, timber offcuts, and a fine grey layer of dust on the landing. The stairs are narrow, the front path is shared, and the car is already parked a street away. Suddenly the "easy" part does not feel so easy.
What worked best in that situation was not rushing. The waste was sorted into lighter sacks first, the sharp bits were boxed, and the route from upstairs to the front door was protected with sheets. The heaviest materials were removed last, and the final sweep happened before anything else moved back into the room. No drama. No damage to the floor. Just one less thing to worry about on Monday morning.
That is usually the pattern. The projects that feel manageable at the start are the ones that benefit most from a calm removal plan. When the room is small, access is awkward, and the debris is mixed, a professional clearance route can save a great deal of time. Not always necessary, but often very welcome.
Practical Checklist
Use this checklist before you start moving waste out of the property:
- All sharp objects are identified and contained
- Heavy materials are split into manageable loads
- Dust and loose fragments are swept or vacuumed into controlled piles
- Walkways, stairs, and exits are clear
- Floors are protected where needed
- Reusable or recyclable materials are separated where practical
- Anyone helping understands the lifting plan
- The disposal method matches the amount and type of waste
- Access for removal is checked before loading starts
- Final sweep and corner check are scheduled, not forgotten
Quick reminder: if the pile looks harmless but feels awkward, trust the feeling. That is usually your body saying, "this is going to be a pain if you rush it."
Get a free quote today and see how much you can save.
Conclusion
Safe removal of DIY debris after Chiswick renovations is really about control. Control over hazards, control over mess, and control over the final stage of your project. The more carefully you sort, lift, protect, and dispose of the waste, the more smoothly the rest of the renovation seems to land.
For smaller jobs, a steady DIY clean-up may be enough. For mixed materials, awkward access, or a large volume of waste, a professional clearance service can remove a lot of pressure from the day. Either way, the right approach is the one that keeps people safe and leaves the property ready for proper use again. And that last empty-room feeling? Quite satisfying, really.
If your renovation has left more waste than you want to manage alone, it may be worth reviewing pricing and quotes and choosing the option that best matches the scale of the job. A calm finish is a good finish.
Frequently Asked Questions
What counts as DIY renovation debris?
DIY renovation debris usually includes plaster, rubble, tiles, timber offcuts, old fixtures, packaging, insulation remnants, and dust-heavy waste from stripping or refitting a room.
Can I put renovation waste in my household bins?
Usually not if it is heavy, bulky, sharp, or too much for normal collection limits. Small amounts of light waste may be manageable, but mixed building debris normally needs a separate disposal plan.
Is it safe to carry rubble sacks down stairs by myself?
Only if the bags are light enough and the route is clear. In most cases, it is safer to keep loads smaller than you think you need. Heavy sacks on stairs are where accidents happen fast.
What is the best way to deal with broken tiles and glass?
Wrap or box them securely, keep the edges contained, and label them mentally at least. Do not toss them loosely into a soft bag where they can cut through.
Do I need a professional for a small DIY project?
Not always. If the waste is light, limited, and easy to sort, you may manage it yourself. But if access is awkward or the materials are sharp and mixed, a professional option can save time and reduce risk.
How do I stop dust spreading through the house?
Seal waste as much as possible, use floor protection, keep windows open where practical, and clean the exit route frequently. A vacuum with a suitable filter helps, but you still need to work steadily.
What if my renovation waste includes old furniture too?
Then a combined approach can make sense. Services such as furniture clearance or furniture disposal may be useful if the room reset includes bulky household items alongside debris.
How do I know whether I need builders waste clearance or general waste removal?
If the waste is mostly from construction or renovation work, builders waste clearance is usually the closer match. If the load is a broader mix of household, bulky, and leftover items, general waste removal may be more suitable.
What should I check before booking a clearance service?
Check what types of waste they handle, whether they provide insurance and safety information, how they approach recycling, and what their pricing or quote process looks like. Clear expectations matter more than flashy promises.
Can I recycle any of the debris from my renovation?
Yes, often some of it. Clean timber, metal, cardboard, and some inert materials may be recyclable, but it depends on how mixed or contaminated they are. The cleaner the separation, the better the chance of recovery.
What is the biggest mistake people make after finishing a DIY job?
They try to clear everything in one rushed sweep. That is when backs get strained, floors get scratched, and waste spills into places it should never have gone. Slow is often faster, oddly enough.
How soon should debris be removed after a renovation?
As soon as practical. The longer it sits, the more it gets in the way, attracts dust, and makes the room feel unfinished. Clearing it promptly helps you enjoy the result properly.